أنثوتايب
Anthothype
Dina Malkawi | دينا ملكاوي


تصوير جورج الخوري
Photographs by George Al Khouri
عن التقنية
يعود فن الطباعة باستخدام الأصباغ النباتية للعصور القديمة، وكانت تستخدم لعدة أسباب منها للحصول على نماذج او رسومات متعددة ومشابهة للصورة الأصل. ويعتمد فن الأنثوتايب على استخدام الأصباغ الطبيعية وهي أول ما استعمل الإنسان من صبغات وكانت مصادرها نباتية مثل النيلة للون الأزرق والخشب البرازيلي للون الأحمر وغيره. العملية تتكون من تعريض صورة إيجابية لسطح عليه صبغة لون نباتية والتي تكون لديها حساسية عالية للضوء، فعند تعرضها لأشعة الشمس تتكون الصورة
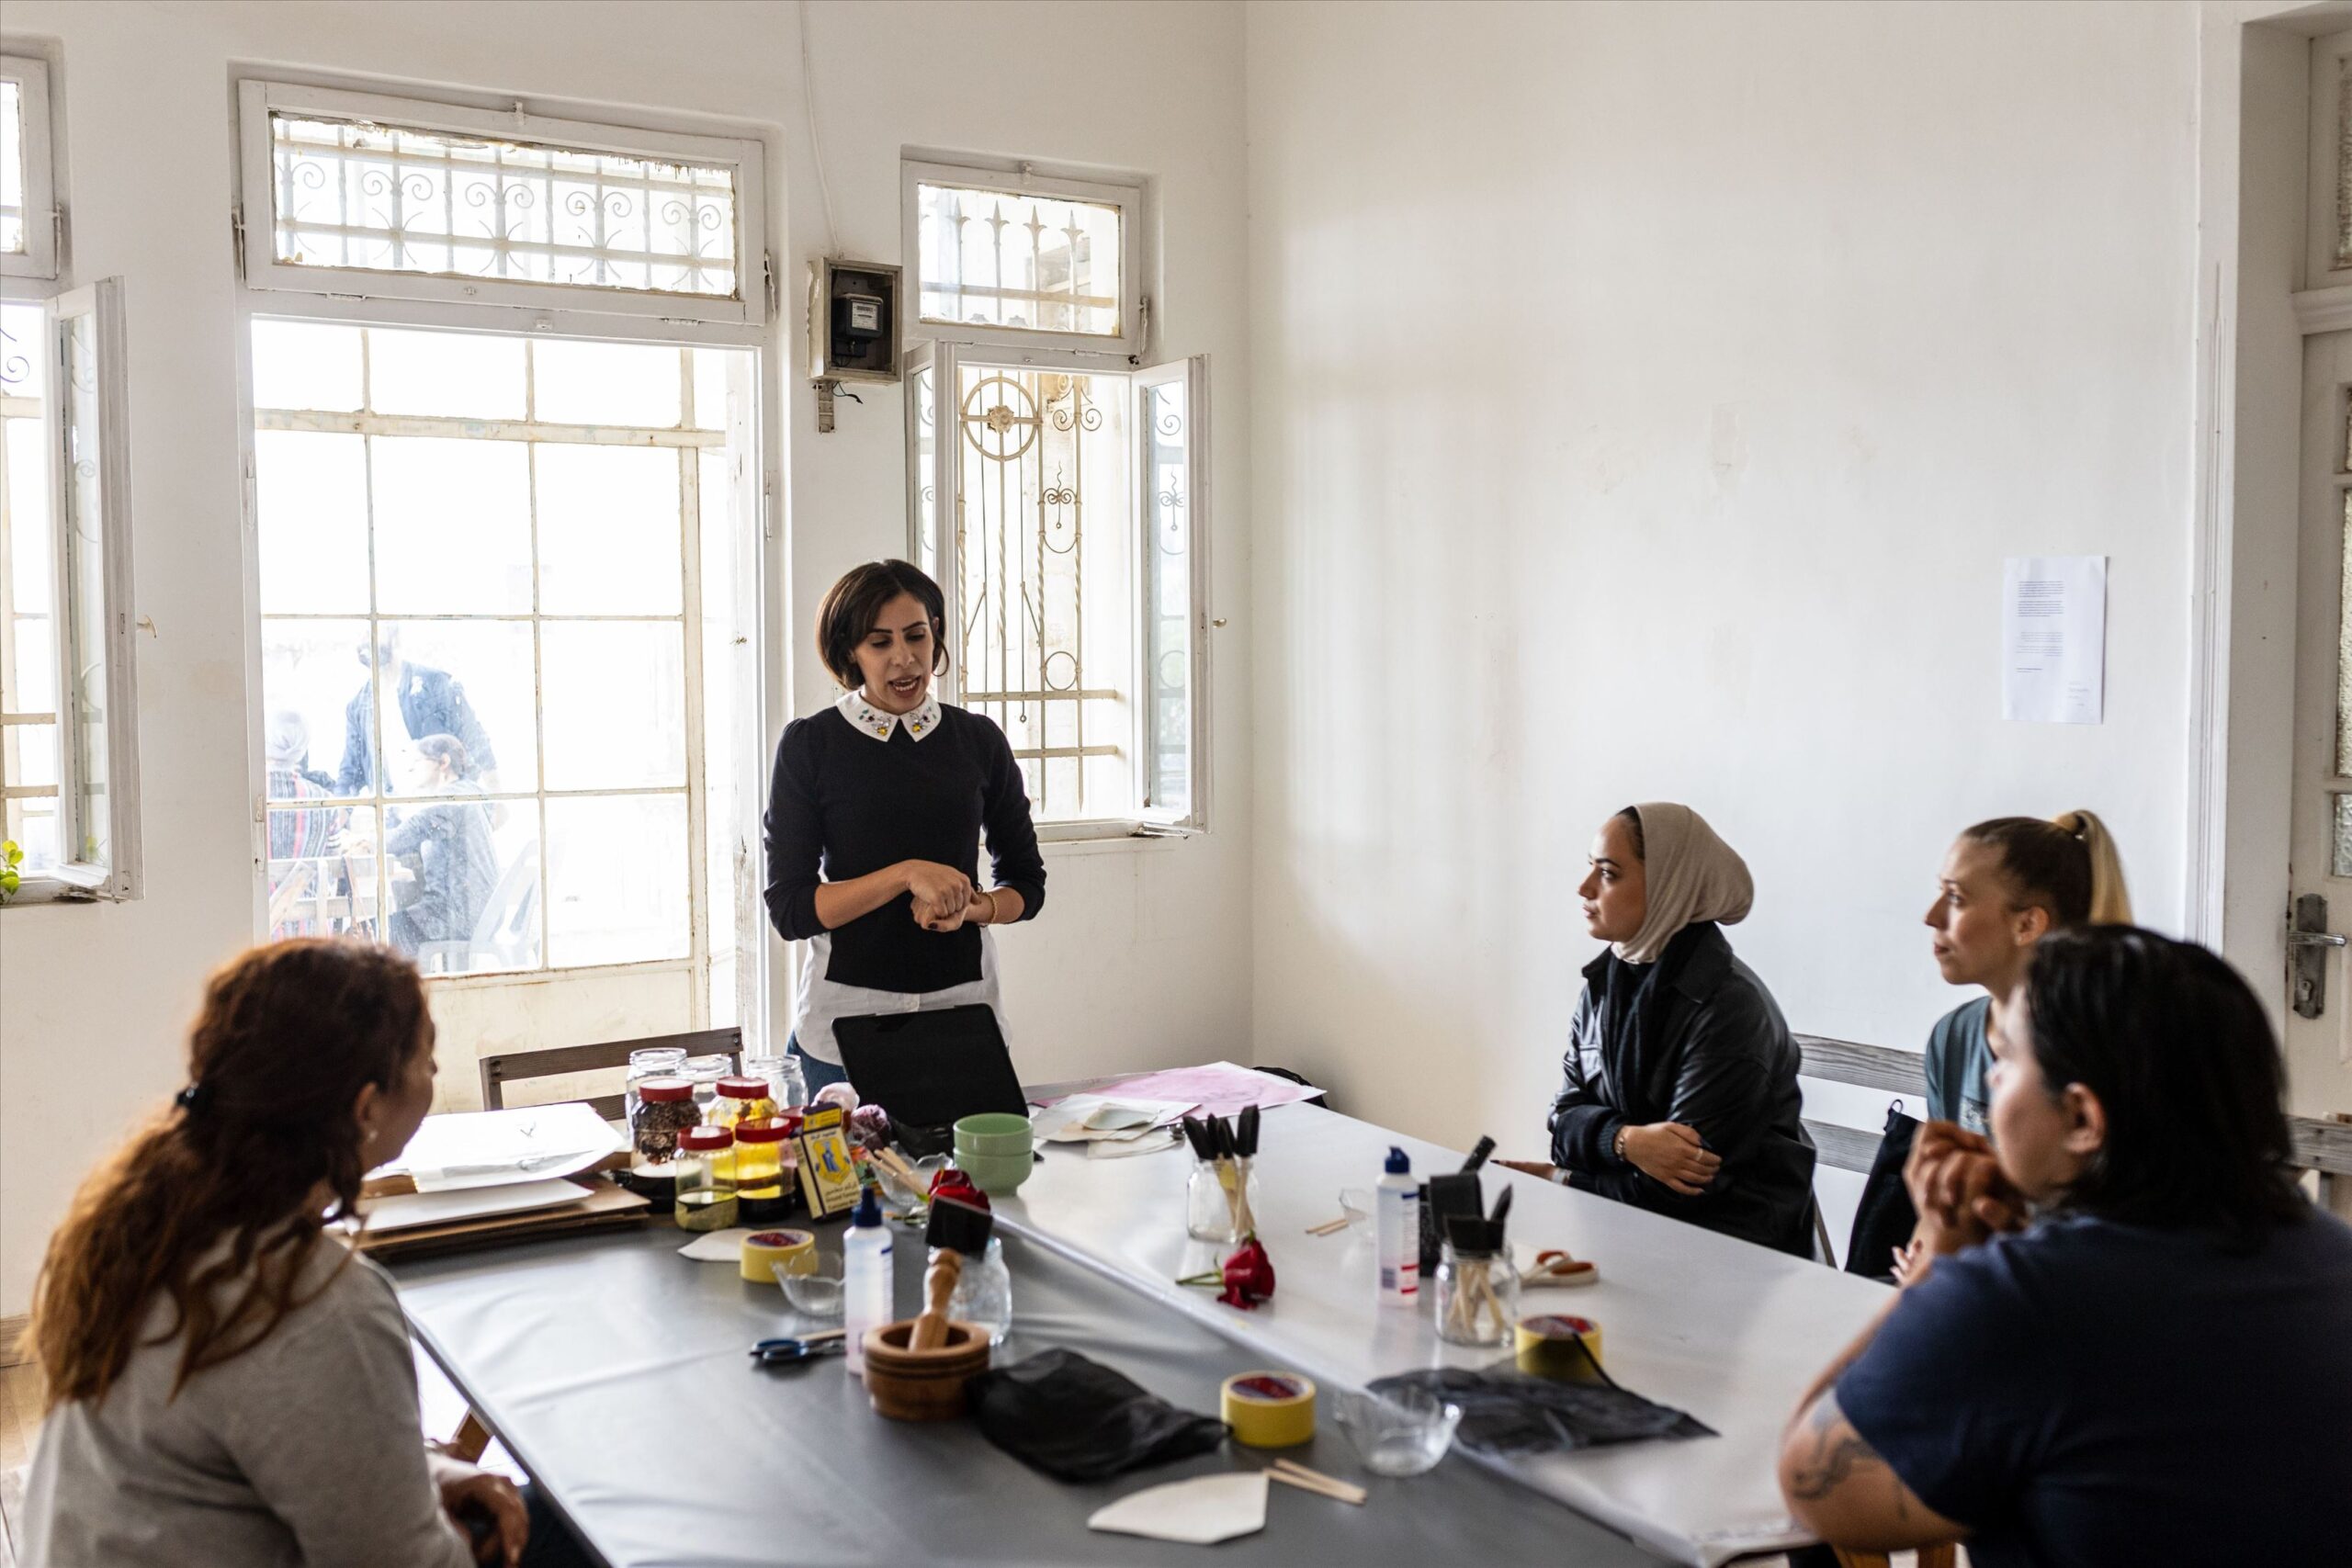
عن الفنانة
دينا ملكاوي فنانة تشكيلية خريجة من الجامعة الأردنية-فنون جميلة. شاركت بعدة معارض فنية جماعية. تتعامل مع عدة مواد وخامات في أعمالها الفنية.مستلهمة أعمالها من الطبيعة والمحيط الخارجي؛ أعمالها مبينة على دراسة التأثير السيكولوجي من الطبيعة والمجتمع على الصحة النفسية للإنسان. في الوقت الحالي تقوم بعقد عدة ورشات للشباب والصغار لأغراض تثقيفية وإنسانية
المواد المطلوبة
فيلتر ورق –
كركم، كركديه، زهور أو أي نباتات أخرى ذات تصبغ عالي –
أداة اسفنجية لفرد اللون –
خلاط ، مدقة (اختياري) –
ماء –
ورق كرتون ابيض –
صورة مطبوعة بالأبيض والأسود على ورق شفاف او يمكن استخدام أشكال ورقية مفرغة (ستنسل) أو أوراق نباتات، زهور الخ
كحول من الصيدلية –
كرتون مقوى أو قطعة خشبية –
لاصق ورقي –
الخطوات
١. قم بتجهيز الأغراض واجمع النباتات المراد استخلاص اللون منها مثل زهور،او نباتات ورقية، او خضار،كركم..الخ
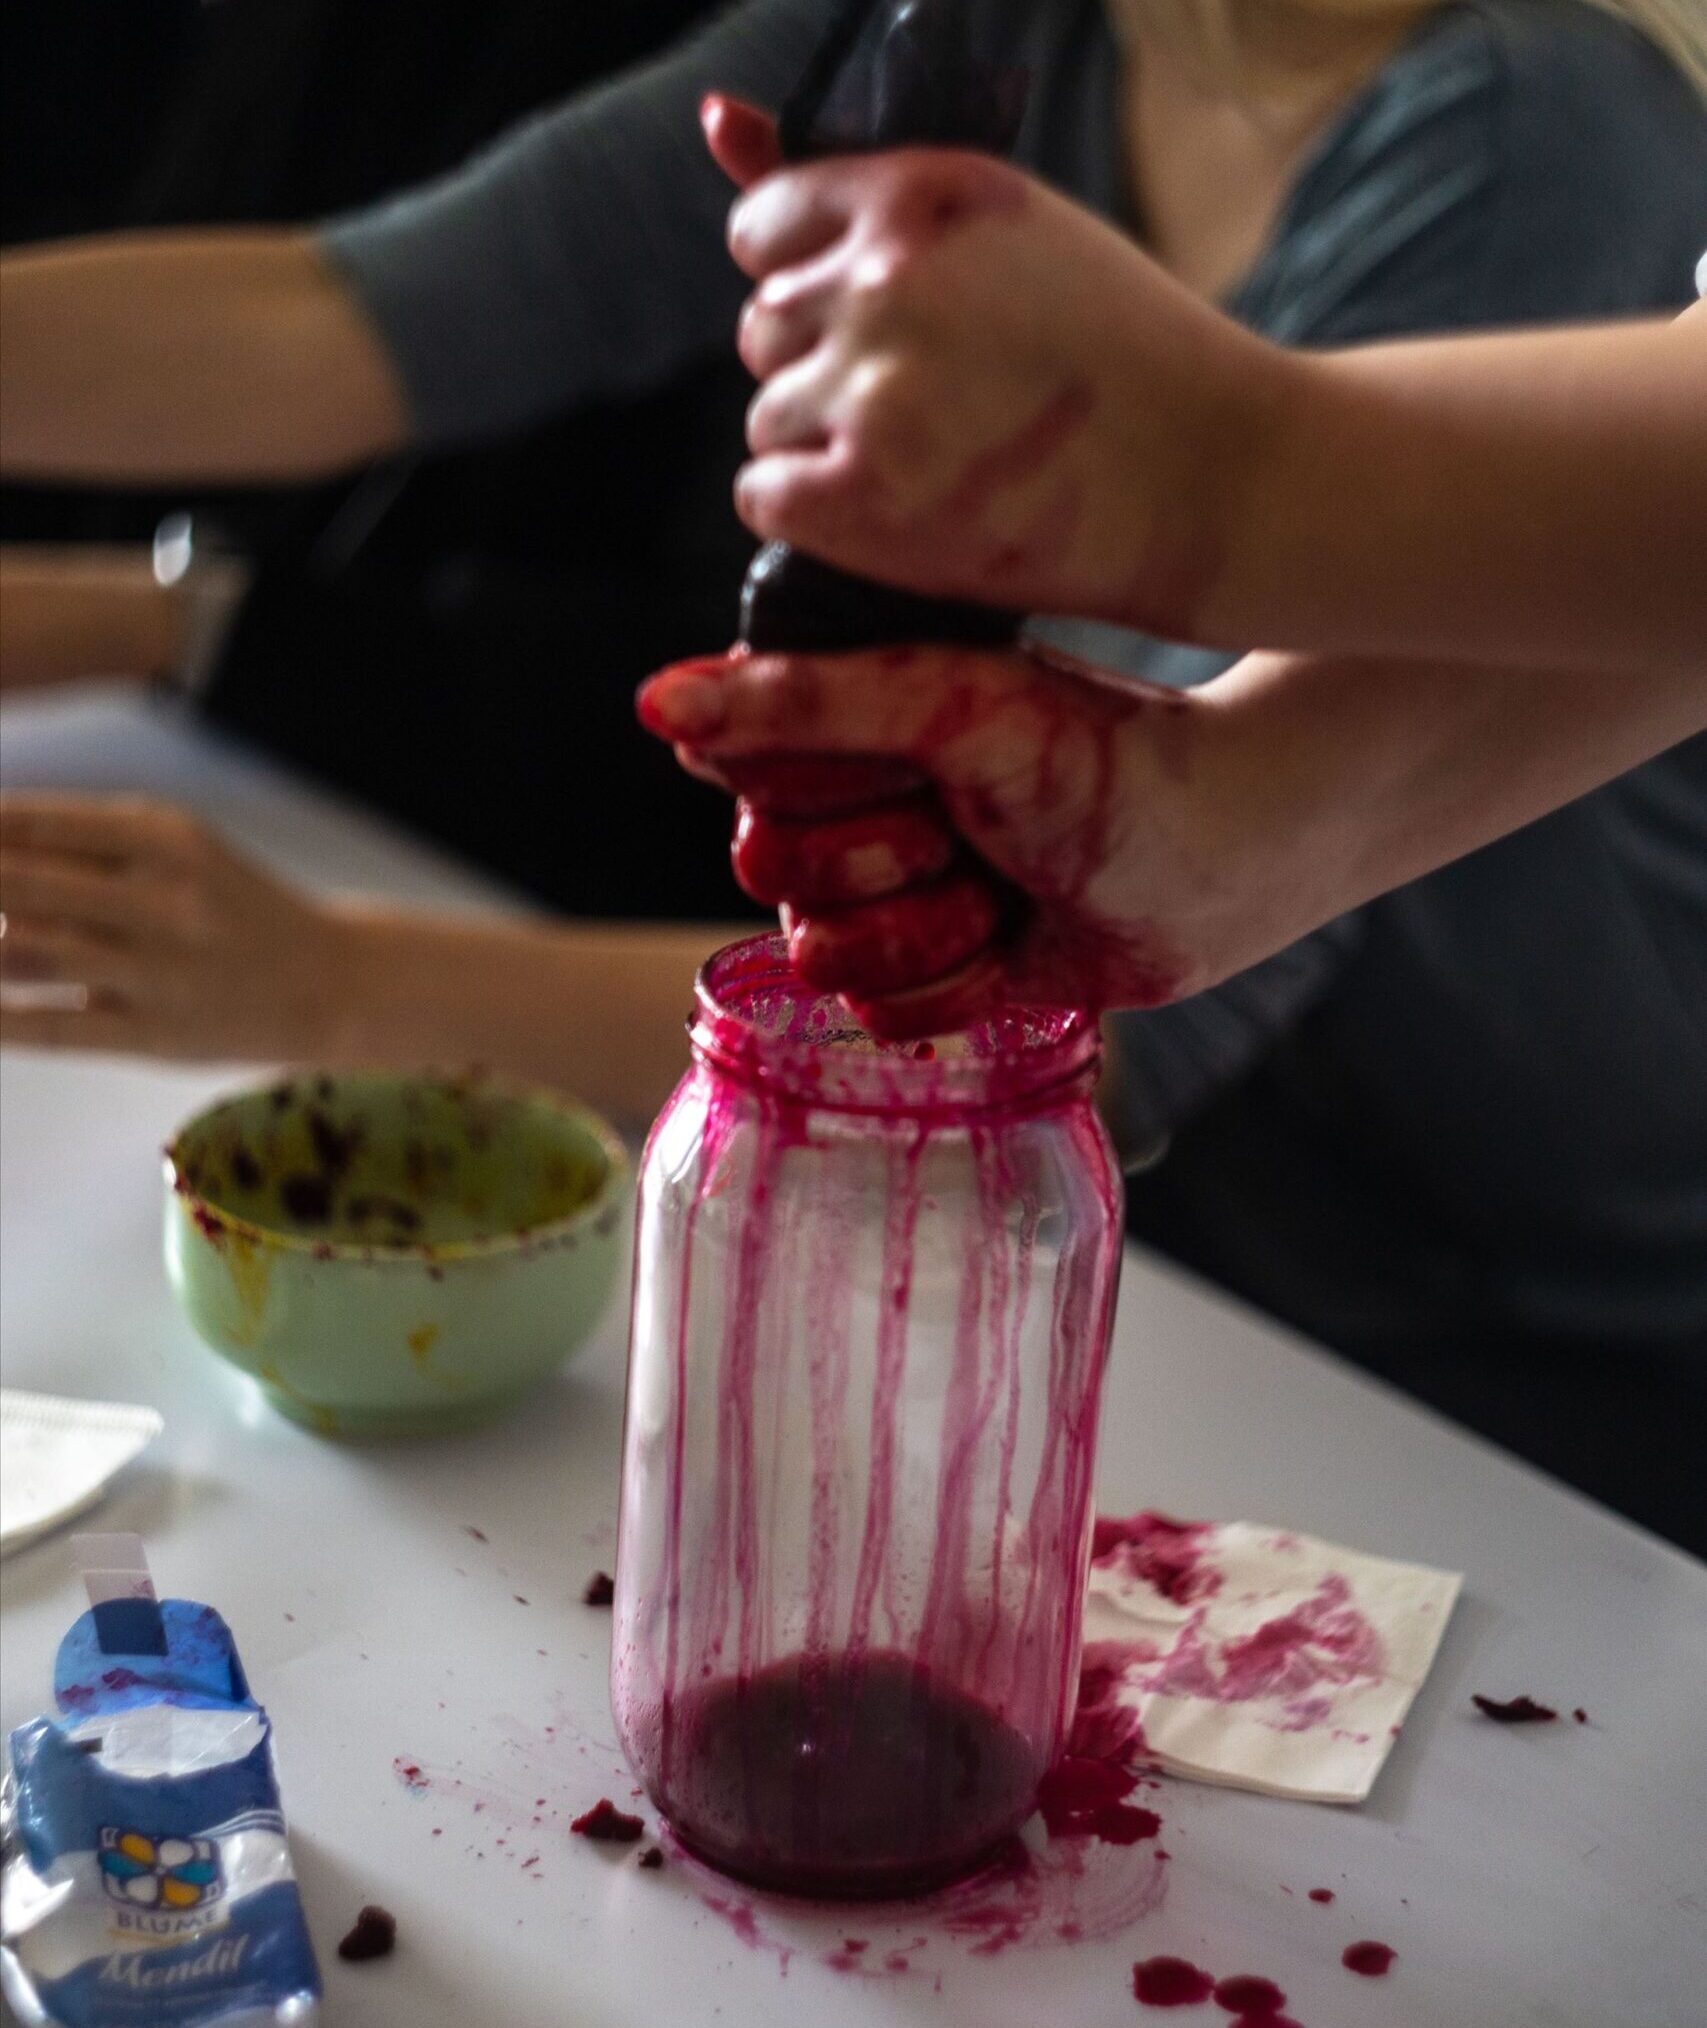
٢. اطحن النبات في خلاط او مدقة يدوية، تستطيع إضافة ماء نقي او كحول لتسهيل عملية استخلاص اللون
٣. قم بتصفية واستخراج اللون من أية شوائب باستخدام مصفاة ورقية. ضع المصفاة الورقية في وعاء وضع الخلطة في المصفاة واضغط جيدا لاستخراج اللون من النبات
٤. استخدام أداة اسفنجية لفرد اللون(الصبغة) على الورقة ويفضل وضع ٣ طبقات على الورقة لتتكون طبقة لون واضحة عليها. ثم تترك لتنشف في غرفة مظلمة
٥. قم بإحضار الصورة الإيجابية أو أي شكل تريده من أوراق شجر او زهور وضعها فوق الورقة
٦. ثبت الورقة على قطعة خشبية أو كرتون مقوى باستخدام لاصق ورقي على اطراف الورقة
٧. عرض القطعة الفنية الى اشعة الشمس واتركها حتى يتغير لون الورقة
٨. قم بإزالة الشكل الإيجابي من على الورقة، وستكون قطعتك الفنية جاهزة
About technique
Printmaking with natural mediums goes way back in time, which were used for different purposes to get various patterns and copies that look similar to the original picture.
Anthotype Art depends on the use of natural mediums such as plants and flowers to create photos and patterns. The first resource people used for producing natural colorings was driven from planetary resources. Such as Indigo for blue color, and Iogwood for deep red color. The process involves exposing a positive image on a surface coated with natural pigments to UV light in order to create a photograph. The sections exposed to the light will be bleached out while the covered parts keep in the pigment.
About the artist
Dina Malkawi is a Jordanian artist,graduated from the university of Jordan- Fine Art. Participated in several group exhibitions. She works with different mediums and textures throughout her art making. Inspired by nature and her surroundings; studying the psychological impact of nature and culture on our wellbeing. Currently she conducts different art workshops for adults and youth for educational and humanitarian purposes.
Material needed
- White cardboard
- A photo printed on a film transparent slide, or a paper stencil, or any shape such as leaves flowers..etc
- Alcohol
- cloth or paper strainer (coffee paper strainer)
- Hard cardboard or a wooden board
- Masking tape
- Natural mediums such asTurmeric,flowers..etc
- Sponge tool to spread the paint
- Food processor or mortar (optional)
- Water
Steps & instructions
- Prepare the emulsion, by crushing vegetables or fresh flowers petals, leaves, or turmeric..etc into a food processor or using a mortar. You can use filtered water or alcohol to ease the process, just make sure to use small amounts to keep the emulsion’s pigment concentrated.
- Add a coffee strainer in a bowl then add inside the emulsion pulp to extract the pure pigment.
- Using a foam brush tool; apply 3 coats on a hard paper and wait until it dries.Make sure you leave to dry in a dark room
- Bring your positive picture or stencil, leave and add above the coated hard paper
- Add masking tape on the sides and stick/ attach it on hard cardboard or wooden board
- Put it under the sunlight until the color changes
- Remove the positive shape and your artwork is ready.